Today I’d like to share my thoughts on a topic that concerns many photographers: how to combine travel photography with a vacation that includes friends, a partner, or family – while still achieving excellent image quality.
From my coaching sessions, like portfolio reviews, I often hear that time is a major challenge. Many want to be considerate of travel companions who aren’t into photography. We also face this challenge regularly when traveling, as we don’t just want to take pictures—we want to experience, smell, taste, and explore as well.
In this article, I’ll explain how to still deliver high-quality images under these circumstances. The first tip is explored in great detail.
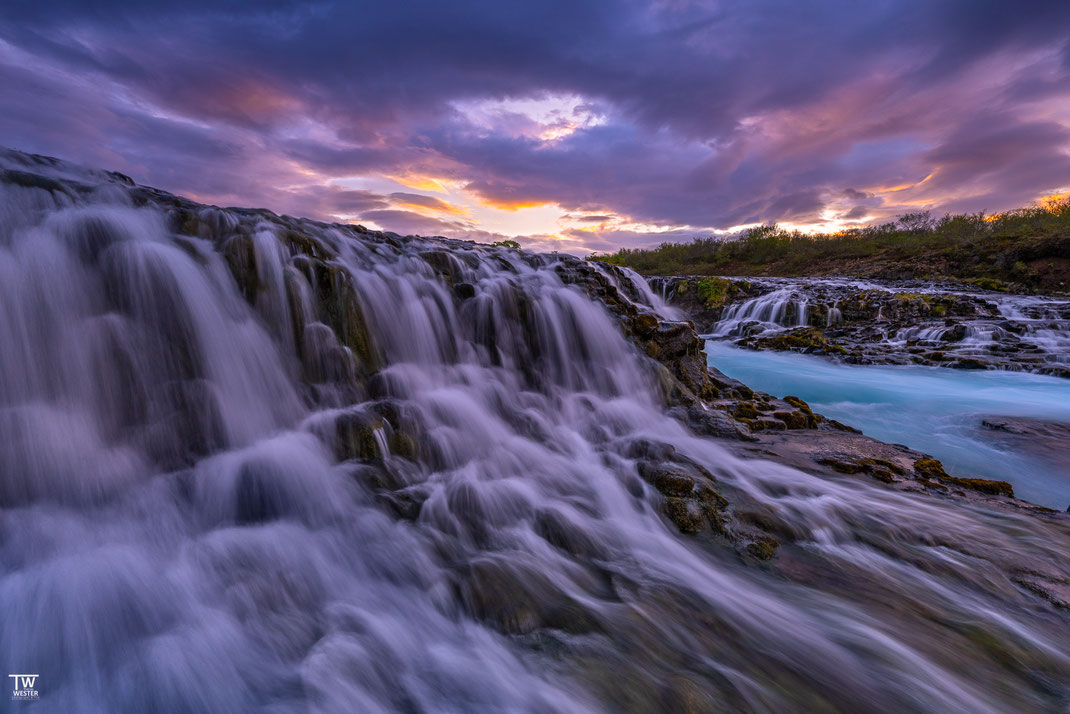
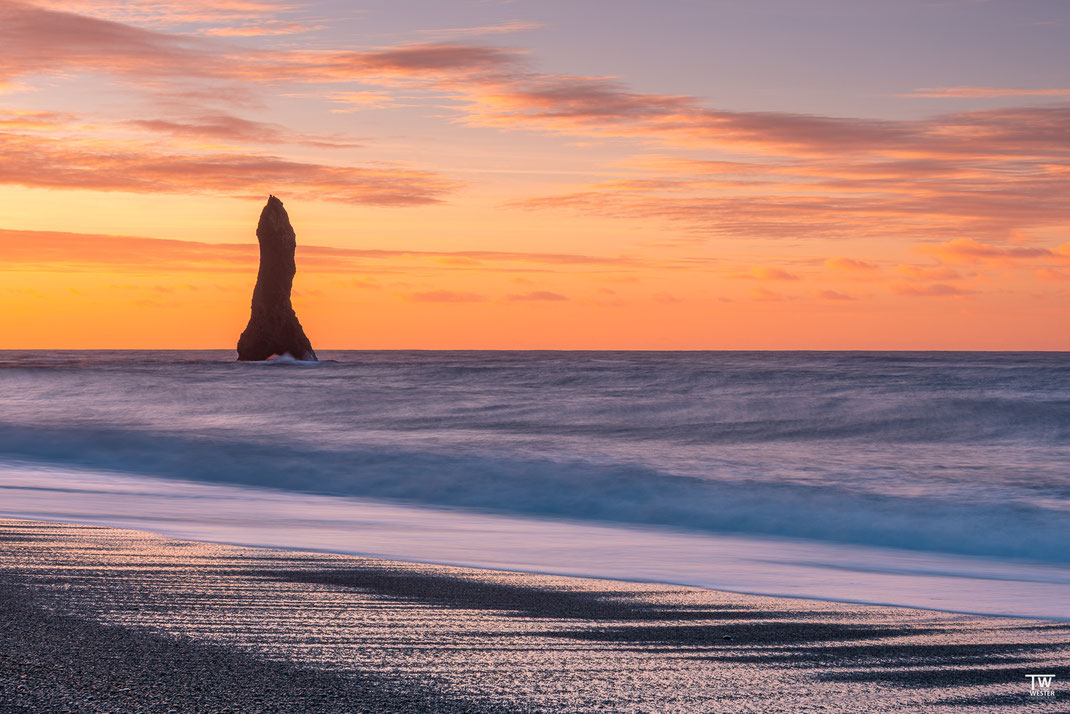
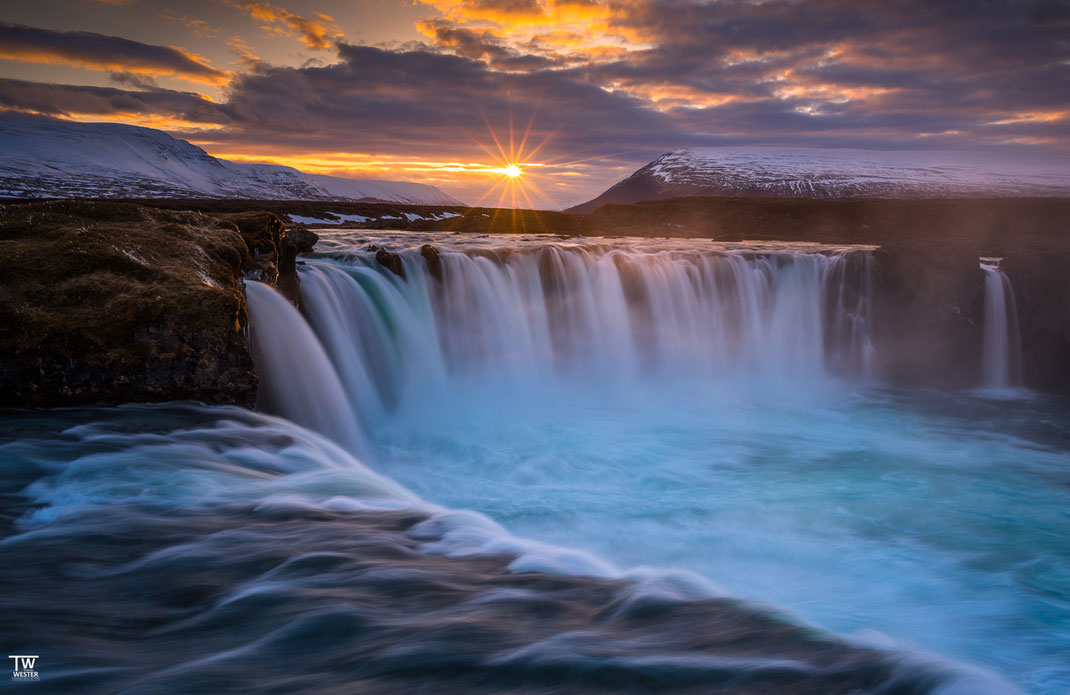
Throughout this article, I often use the term “family-friendly”, but I’m also referring to any form of friendship or partnership in which not everyone is into photography. For the images in the post (except for one collage), I spontaneously chose some shots from Iceland, as I recently re-edited them using my current workflow 😊
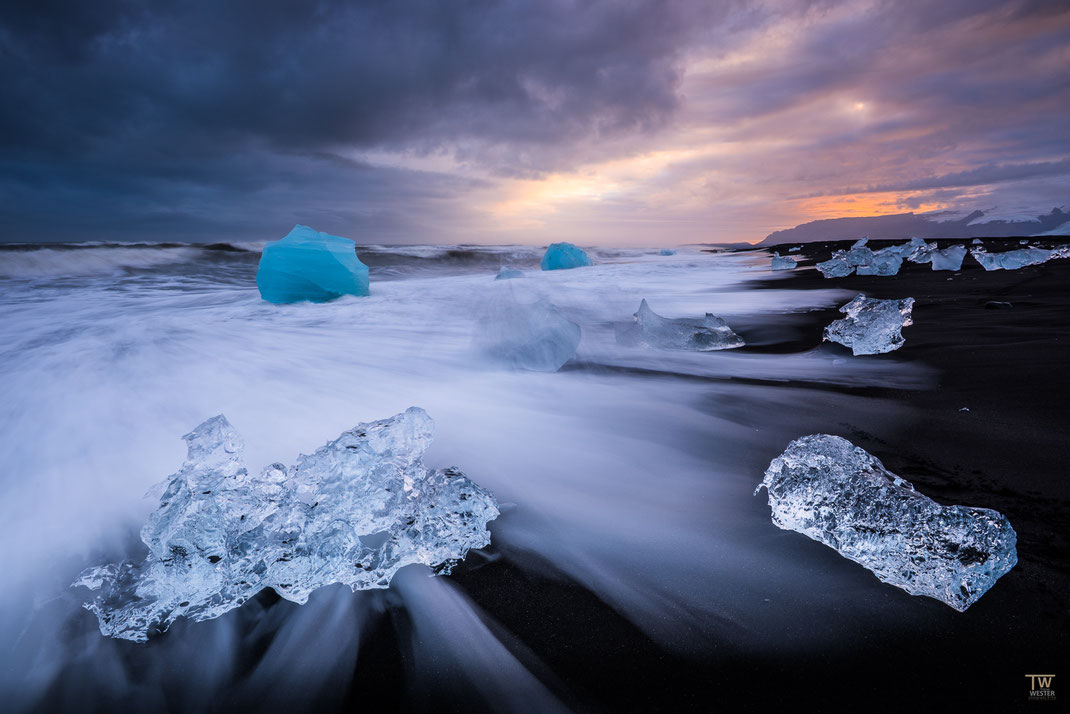
Rarely have I experienced such perfect conditions as during my visit to the glacier lagoon in 2016 – especially since I’ve never seen such intensely blue ice blocks at Diamond Beach again (though they were in the lagoon).
1) Take fewer photos, but at the right time
Photographically interesting destinations are often breathtaking overall – which makes it tempting to constantly reach for the camera because of the abundance of subjects. But from a purely photographic and advanced perspective, most images taken outside the ideal light conditions are more suited for the family album.
Let’s take a 10-day trip as an example: from my perspective, the quality of just 20 top images determines the overall success. And those require the right light – which is rare and brief.
Photo series like the recent ones on my blog with 20 images each are not taken evenly across 10 days. I don’t just select the best photo of each day or location. Instead, I have a personal quality threshold, and only the images that exceed it make the cut. Some days, zero images meet that bar, other days eight might.
If you manage to be on location for just one hour at sunrise or sunset, you’re far more likely to get “Top 20” shots than if you photograph all day but only catch 60% of the golden hours.
On a 10-day trip, you typically get 2–4 really good sessions. If you miss over a third of the golden hours, there’s a good chance the “epic” sessions will fall on the days you skipped. Trust me—you can set your watch by it 😉.
To close that 40% gap requires motivation, planning, and real thought. For solo pros or travel buddies, that’s no big deal. But when you’re with friends, a partner, or family—it’s a different
story. So how can you still make it work? Here are my key takeaways:
a. Clarify your photographic goals before the trip
Do you really need 100 “nice pictures”? Or would 10 or 20 outstanding shots be enough to truly remember the trip? I personally aim for two strong images per day—though I don’t always achieve that. My tip: focus more and reduce shooting during the day to concentrate on prime conditions. Your travel companions will also perceive it very differently if you only take out your camera briefly in the mornings and evenings instead of carrying it all day.
b. Consider golden hours early in your travel planning
Do sunrise/sunset times conflict with family time, meals, or activities? Your choice of destination and season has a huge impact on group dynamics. For example, we personally avoid private trips where sunset is at 8:30 p.m. or sunrise is after 9:00 a.m.—those schedules just don’t work for us.
c. Identify the most versatile photo spot of your destination
Take islands like Tenerife, Madeira, or Mallorca. Each has 20–50 great locations. But in the end, there are usually 1–2 key spots that produce most of your keepers. You can often identify them ahead of time if you know your style. Tip: plan multiple sessions at those exact locations. I explained my method in detail in an older blog post, if you're interested.
d. Stay as close as possible to those key spots
It sounds trivial, but it’s essential for balancing photography and regular vacation. I recommend staying within 10–20 minutes of your key spots. For example, if you stay in Funchal (Madeira), reaching the Fanal laurel forest takes over 2 hours round trip – and most photographers need several attempts there. That’s why I often use Booking.com’s location filters, accepting compromises for better positioning.
e. Don’t skip a session just because of a poor forecast
Sure, certain forecasts lower your chances of good light. But even on the worst days (excluding storms), there's still a fair chance of a break in the clouds. The temptation is high to cancel, especially if the “window view” looks bleak—and your travel group will likely agree.
Two key insights:
- Visible weather from your window is often irrelevant. Instead, I recommend checking real-time satellite simulations to see where the clouds are moving.
- There’s an ironic phenomenon in landscape photography: when the sky clears briefly during bad weather, the light is often epic. These sessions often produce the best shots of the trip. So: don’t cancel—be ready and on site. Again, it helps to be staying nearby…
It started raining again one hour after this shot. Yet this morning yielded my favorite photos of the whole trip.
f. Make sure you're set up logistically for each golden hour
Prioritize that one hour before and after sunrise/sunset when skies might turn gold or pink. Depending on location and season, you can usually predict this well. In the Algarve on a sunny day, for example, it’s more like 20 minutes before to 40 minutes after sunset.
g. Communicate your plans openly with your travel companions
Make clear agreements before the trip—this makes everything on-site more predictable and conflict-free.
2) “The thing about weather luck” – you decide what perfect weather means!
This tip also revolves around light and weather. Sure, I can’t control the weather—but I can increase the chance of having ideal conditions for my chosen subjects. After all, I still choose the subjects 😉
Let’s say I’ve arrived at an epic viewpoint with mountain vistas, but the light is flat (plain blue skies or dull grey clouds). I don’t start shooting subpar versions of my planned compositions while hoping the light improves.
Instead, I look around:
- Are there cool sand or rock textures?
- Does the waterfall nearby offer interesting ice or water formations?
- Could I shoot “intimate landscapes” without sky?
- Are there wildlife photo opportunities?
Nature is full of options—and for these kinds of images, I actually need soft overcast light or full sun without clouds.
In the following collage, I show examples of images taken while I was originally planning to shoot something completely different nearby. All of them are “Plan B” shots—but as you can see, they’re far from boring or dull. Some even won awards.
That’s why I apply this approach without exception—which is also why my blog and travel galleries rarely include images with poor light. It’s not about luck—it’s about consistently sticking to this process.
3) “Know your taste” – ignore mediocre motifs
I’ve written about this before, but it’s worth repeating: when aiming to improve image quality on a trip, it’s vital not to waste too much time on only moderately photogenic subjects or compositions.
The risk is that you’ll end up unsatisfied with your own work, even while you're still reviewing it on location. And that wastes precious good light. Put another way: better efficiency always leads to better results.
Yes, I know—it’s hard to recognize that in the moment. This is a skill you improve with experience and never stop developing.
One possible decision-making factor is the presence of distracting elements in the frame. I explored that in depth in another blog post if you're curious.
To get started, I recently described a method in a blog article on how to find your own photographic taste using references. Here’s that relevant section:
What do I mean by “references”? I don’t mean copying someone’s photo. It’s about immersing yourself in images from a particular subject world. If it’s hard to translate inspiration into action, start by selecting 50 images you really like within one genre—screenshots work fine.
Example subject worlds: “autumn stream photography,” “North Sea dunes,” “Iceland waterfalls,” “alpine lake reflections,” “wild garlic forest photography,” etc.
Narrow it down to the top 25 images, then analyze: what do they have in common? Example analysis for Vestrahorn dune photography:
- Focus on wind-shaped sand patterns
- Everything in sharp focus
- Entire Vestrahorn visible (not cropped)
- Strong leading line in the middle
- Light on the Vestrahorn itself
- Horizon in upper third
- Hills on both sides, shot from a dip
- Focal length under 16mm
- No vegetation in the foreground—just sand
- Strong clouds matching the rugged mountains
Now I’ve identified the core elements of my taste—which helps me on-site. Then I sort:
- Planning: Items 5 & 10 relate to season and weather selection
- Location Choice: Items 1, 3 & 7 help me pick the right hill or spot
- Composition: The rest are used when framing the shot
If I don’t find sand ripples—I move on. No dip between hills? Not my spot. Only half the mountain visible? Keep walking…and with 300 hills, I’ll eventually find the right one 😉
That’s it for today! If you follow these 3 tips, things will already go much more smoothly on your next trip 😊
Wishing you lots of joy on your next adventure 👋
Best regards,
Thomas