
Once again, midsummer is not my favourite season for photography 😊 Until I finally go travelling again in two weeks, I'm using the time to address a few topics that I wanted to cover in my blog anyway.
Today, I'm going to write about backlighting perspectives, which I have preferred to seek out in recent years whenever possible. Planning in advance plays a big role here. Autofocus can also make some problems, and there are a few other issues that are not easy to deal with.
However, today I will focus primarily on the right exposure and discuss topics that are particularly important in this context during a photo session. This article is aimed at beginners and advanced photographers in both genres and does not claim to cover all aspects of the topic.
I simply want to share a few thoughts on the typical challenges, as I am regularly asked questions about them in my coaching sessions.
1. Landscape photography
A typical problem in landscape photography is a high dynamic range, i.e. the difference in brightness between the dark areas (‘shadows’) of an image and the bright areas (“highlights”) when shooting against the light. I will sometimes refer to this as ‘spread’ in this article.
Especially with seascapes, I would still always recommend shooting towards the sun, as I have had a few frustrating moments when shooting with the sun behind me. Even though the sky can, of course, be coloured in any direction.
However, the probabilities are very different. With the sunrise or sunset behind me, it simply happens more often that (always viewed from the horizon) as much as 100° of the entire sky behind me is spectacularly coloured – but not the 60° in front of me, which I actually need for my image composition towards the sea. This is also one of the reasons why I like to take photos in the Algarve in winter – in the morning you can take photos on the south coast towards the south-east, and in the afternoon on the west coast towards the sunset.
As an example, I have selected a photo that I have not yet shared on the blog – it is also one of my favourite photos from this year. For this type of light, I first need backlighting and secondly, the colouring needs to be quite close to the horizon. Here, only about 40° of the sky above the horizon was coloured orange/magenta.
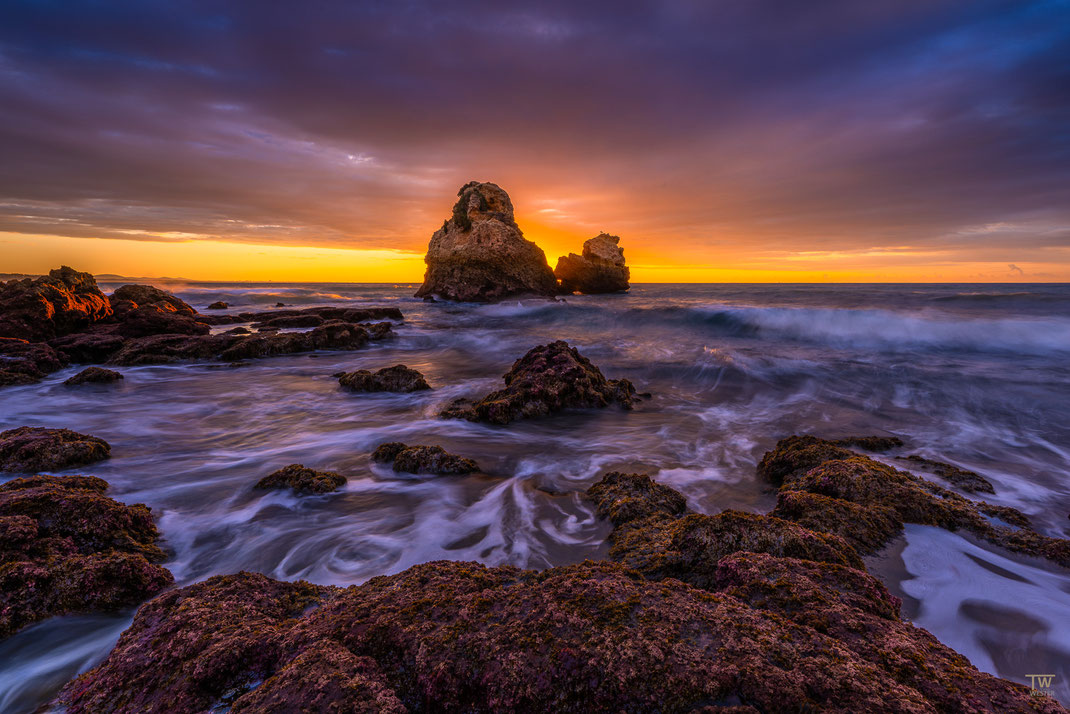
That's why spots where you can take photos in almost all directions are great – but that's not the case on many stretches of coastline in Western Europe. But back to exposure.
First, I use a GND filters to reduce the above-mentioned spread a little. Technically speaking, you don't need this if you're going to composite an HDR later anyway. However, I like to get as close as possible to my final image on the display while I'm on location.
At this point, I won't go into a deep dive on the topic of filters, but I'll summarise the subject: for seascapes and most landscape scenes, I use a 0.9 soft GND 90% of the time.
But that's not enough. With the same degree of processing as in the image above, the image with the filter would initially look something like this:

The spread is still too strong here. In this version, I miss the beautiful purple colours of the aquatic plants, which are clearly visible to the human eye on site. Of course, I could edit this single image more heavily so that it would end up looking similar to the upper version, which is a composite HDR. However, this would be at the expense of image quality in many areas (noise/details/colours...), especially if you want to print the image larger later on.
That's why I now use my camera's bracketing function much more often in such situations and later combine several images into HDR using Lightroom. The result is often more harmonious, especially in the sky.
Since I almost never photograph in strong/white backlight, I don't need a large spread or many images when bracketing. In 90% of situations, I use the following settings: Number of images: 3 or 5, and exposure spread: 0.7 or 1.0.
Regardless of whether I produce 3 or 5 images, I later review on my computer how many images I actually need for the HDR. For the scene in question, I used my standard setting of 3 images with a spread of 0.7. In Lightroom, I only combined the darkest and lightest images, i.e. -0.7 and +0.7.
This is how I usually photograph other nature detail scenes (plants & colour forms). I use bracketing because, in my experience, I often find that I prefer a brighter or darker exposure at a later stage. In this genre, I usually only take 3 shots with a 0.7 spread. So here it's all about getting the best single shot and not about mastering a high dynamic range.
Overall, it's not rocket science and it's a quick process to learn. Unlike the following chapter.
2. In wildlife photography
In my opinion, this type of photography is much more difficult. Instead of using a specific exposure technique, I have to solve things much more on the spot in terms of perspective, and that simply requires experience – the more, the better.
This is partly because I don't use HDR technology for these subjects. After all, I work with a high continuous shooting frequency to capture the ‘perfect moment’, as the subjects are usually not static.
This means that I can't capture such large differences in brightness as in landscape photography. In addition, I usually use higher ISO values. Since I am often interested in extremely soft light and beautiful colours at sunrise and sunset, I almost always end up with > ISO 1000. Especially between ISO 2000 and 6400.
Despite the now excellent denoising tools available (LR, DxO, Topaz, etc.), it is still not possible to get as much out of such images in post-processing as, for example, from a long exposure landscape shot at ISO 64.
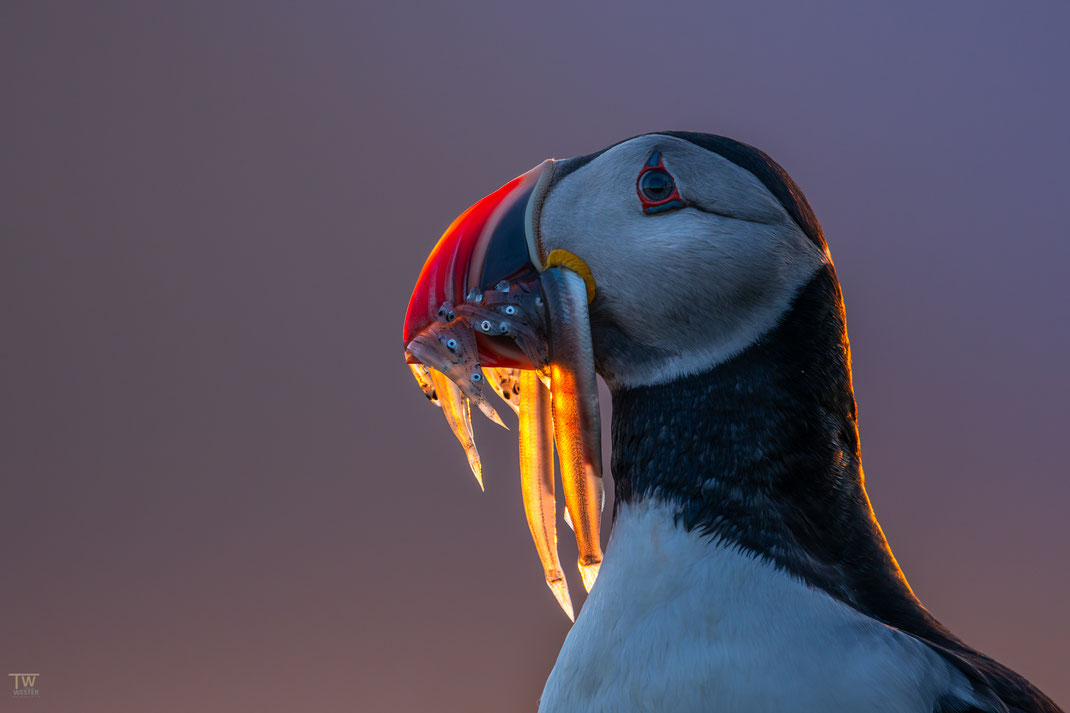
And yet, many advanced wildlife photographers are in the same boat as landscape photographers: despite backlighting, I still want to see detail in my main subject, as in this example:
However, this is not easy to achieve. It is easy for the subjects (animals) to appear black and only recognisable as silhouettes, or for whitish areas (technically burnt out or appearing burnt out) to appear in the image, for example in reflections on the sea or the sun. For me, the latter is a clear reason for rejection.
To avoid this, I essentially use three levers, in the following order:
- the right time in combination with the choice of perspective
- the precise selection of the background
- the angle of the shot to the sun when it is in the frame
I would like to explain this in more detail using the example of a photograph of a puffin colony:
1. Time and choice of perspective:
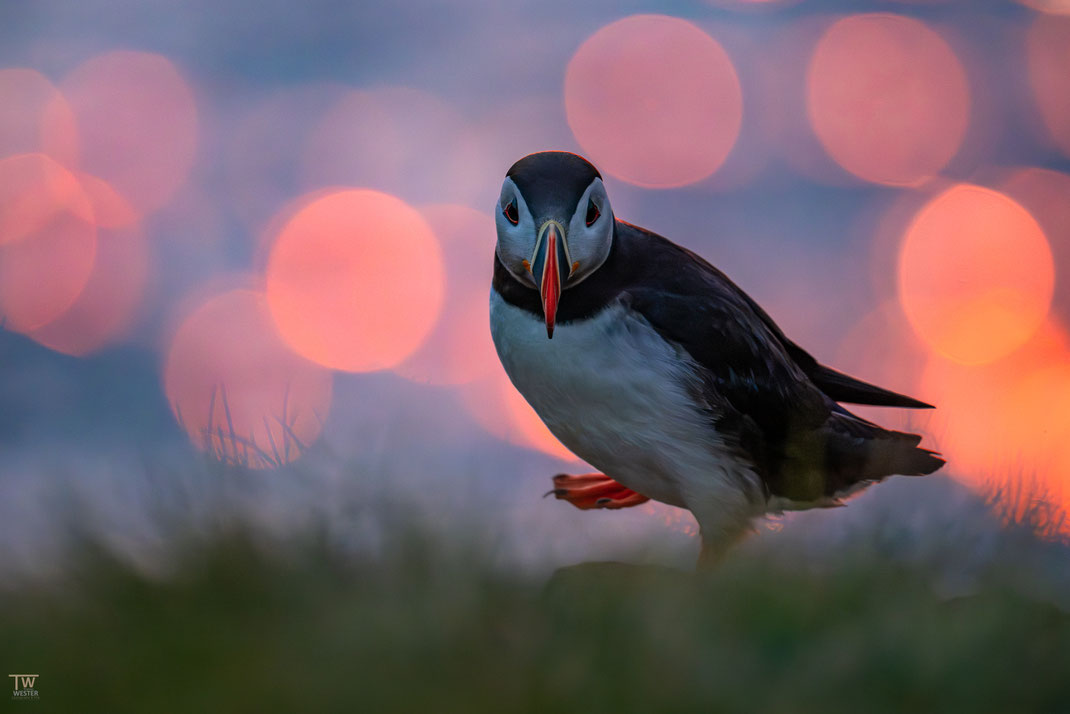
As long as direct light falls on these subjects and I have the sun behind me, I hardly ever press the shutter release, even 45 minutes before sunset in the (not yet perfect but still beautiful) evening light. This is not because of the lighting on the bird, but mainly because of the colouring of the background. I cannot create such soft colours any other way:
In principle, I overexpose the background here – and that doesn't work if the (partly white) bird is already well lit, because then its breast feathers would be ‘burned out’.
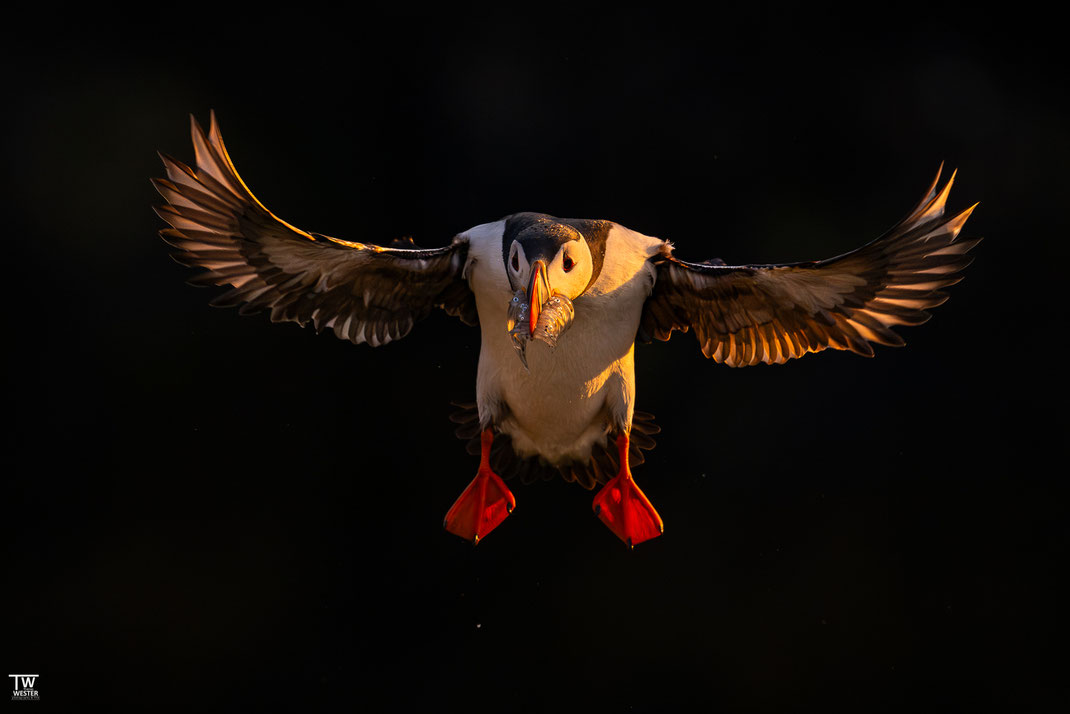
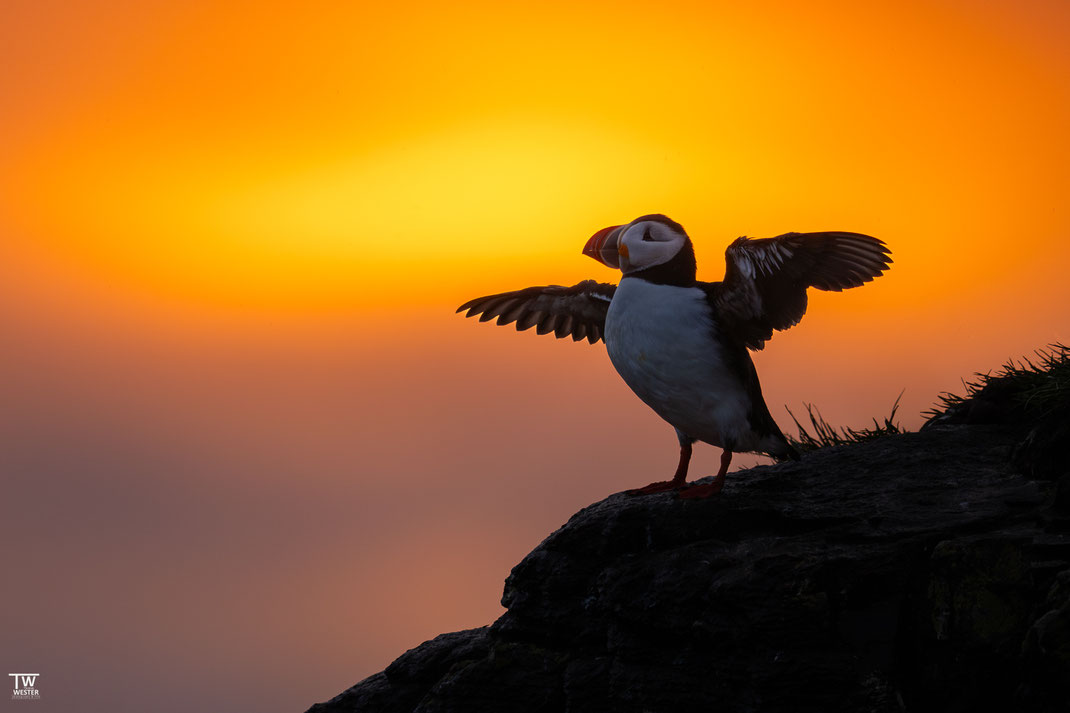
Otherwise, I won't be able to capture both the colour tone and the brightness. That's exactly why I almost always photograph in the shade at times like these (especially on a winding bird cliff, where you can find shade almost any time) or in backlight. So I definitely make use of this time (45 minutes before sunrise) and deliberately go straight into the backlight. Especially if you want the wings to be illuminated, you need a certain intensity of sunlight anyway. In the following example, I did exactly that; it was a mixture of side lighting and backlighting:
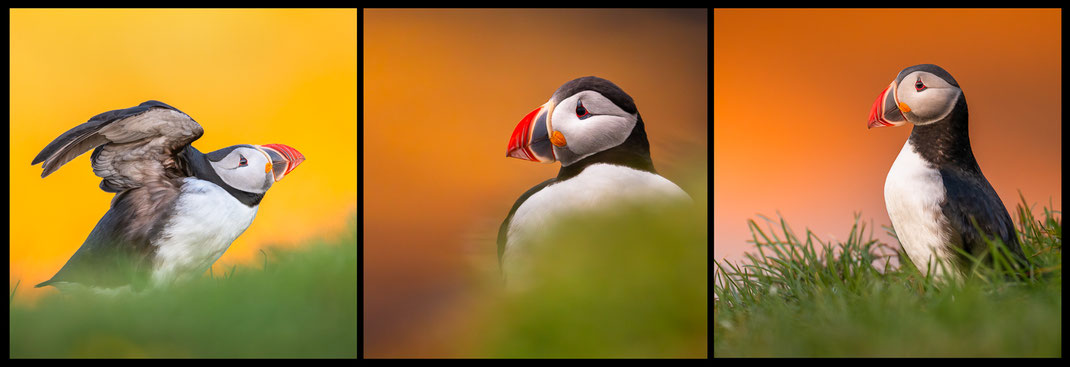
2.Selecting the background
With long focal lengths > 400 mm, even the slightest change in the shooting position or angle of view can often result in enormous differences in the brightness and colour of the sky. Let's take this shot as an example:
When shooting against the light, it is crucial to change your position and, above all, the angle of view by a few centimetres to the right, left, up or down.
In this case, moving the lens just 1-2 centimetres resulted in a completely different colouring, as the purple/blue hue only appeared in a very small area of the landscape – in front of a shaded, distant mountain ridge. Since the bird was not moving, I had to form an exact line between the point in the landscape and the puffin and move myself until it fit.
In addition, when I want to show a translucent effect or such a border with animals, I need a darker background. So, I often start by looking (with a defocused lens) to see if I can find an interesting/desirable background colour and then try to find the right ‘line’ somehow.
3. Shooting angle directly towards the sun
This point is about getting very close to the sun in perspective or even having it in the frame. This also presents new challenges.
Depending on the lens, this can sometimes result in unsightly artefacts, flares, etc. Some of these effects can also be used artistically, but for the purposes of this article, I will now go through the case where you want to capture the scene in a fairly classic way, as shown in the following example:
For shots like this, directly towards the setting sun, the exact conditions are important. This kind of shot, or more precisely lighting, isn't possible with every setting sun, no matter how beautiful the sky is. The sun can quickly turn white, especially when it's still shaped like a ball.
In combination with the sea, in some cases this can even result in a kind of ‘white line’ due to the reflection of the still too bright sun on the sea. This can look quite unattractive. The effect also occurs in landscape photography.
But let's assume that the light is now soft enough for such a shot. Here too, at a very acute angle to the sun, the slightest changes in the shooting angle determine the colour, illumination, flares and colour gradients in the image.
So it's definitely worth moving the exact location and changing the shooting angle slightly. Similar to point 2, a slight change can also determine the homogeneity of the exposure, or in practical terms, the dynamic range. Or to put it another way: it determines whether I still have detail in the plumage and can recognise the bird's beautiful head shape.
If I move a few centimetres higher in the example, the bird (and unfortunately also the unattractive rock) becomes much brighter, but the colour of the sky becomes significantly less intense. If I move a few centimetres lower (puffin in the same place in the frame), the colour becomes even more intense, but the bird becomes darker and darker.
This is simply detailed work and you should be aware of it. That's why the reject rate is often very high with such shots, especially when shooting freehand with a long focal length > 600mm; in this case, it was over 1000mm....
And that concludes my thoughts on the subject for today. I hope you found some of them interesting. In two weeks we are travelling to Madeira, where we will spend the second part of our parental leave this year. I am excited to see what I can bring back for you – more on that soon in my blog.
Best regards,
Thomas