
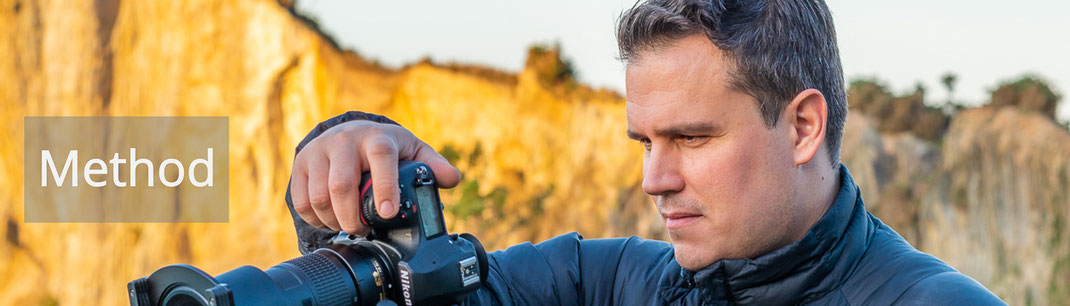
On many days on a photo trip, you are simply overwhelmed as a participant and especially when the conditions are good, everything often runs like "clockwork".
Especially in the exotic Nordic spots of landscape photography, however, the conditions can sometimes be challenging. But you can prepare for that. I recommend this article to those who have less previous experience with photo trips or workshops in landscape photography and would like to prepare themselves accordingly. I believe the 5 minutes of reading time are well invested 😉
THE CHALLENGE
"Oh dear, the wind is gusty today, the temperatures challenging, the waterfall in front of me offers a thousand possible perspectives, ah now the light is coming through, quickly adjust the settings, stop - which filters do I need again - secondly why is everyone photographing in the other direction and is there actually still open aperture from before? Oh, I still have the manual focus in there... and why is my viewfinder black right now?“…
Even in dream locations like Iceland and Norway, workshop participants can quickly succumb to the many impressions and simultaneous challenges. To avoid potential frustration, I would like to talk about some of the insights I have gained from the last two years of coaching and workshops.
MY RECOMMENDATIONS
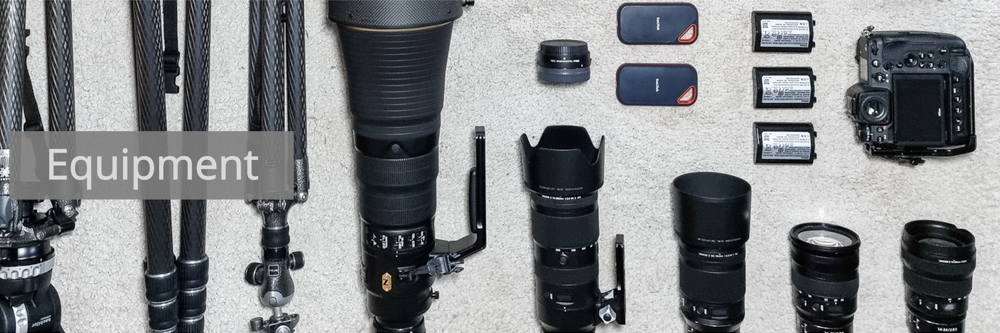
Before every workshop I am asked if I have any special recommendations for equipment - here is a list of things that are sometimes missed on location:
- Filter choice: keep it simple! There must be a 3-digit number of types of filters on the market. Some participants want to make everything perfect straight away, come with a bulging filter bag and struggle daily with the right filter choice on location. In my experience, 4 filters are enough to cover 99% of all common situations. Namely a polarising filter, a 0.9 soft graduated ND filter as well as an 8x and a 64x ND filter. I myself use NISI filters
- Ultra-wide angle: Every millimetre of angle makes sense! Many participants with a 16-xx mm wide-angle lens say at the end of the workshop that a 14-xx would have been more advantageous. I share this opinion and recommend such lenses, such as a 14-24 or 14-35, especially for seaside and night photography
- Camera/ballhead connection: a bad connection between camera and ball head can quickly cause frustration: I recommend a suitable L-bracket for the camera and a quick release clamp for the ball head. I use a RRS B2 LR II, but a smaller and lighter solution will do; mine is bigger because I regularly use super telephoto lenses on it
- Headlamp: For star or northern lights photography, a headlamp with red light mode is recommended (because of the dark adaptation)
- Rubber boots: Yes, sometimes things are trivial. For good perspectives, during landscape photography, you often stand in shallow water up to 20 or 30cm deep for a longer time. If you stand in there permanently, even the best Goretex shoes will get off. I recommend rubber boots with a good sole and a suitable footbed that are also suitable for hiking. For example, the Aigle Iso Parcour 2. It's important to have them handy during the trip. You don't have to wear them for every spot, but I recommend always leaving them in the car or bus. Except from May-October, the same applies to "Grödel" (spikes) in the Nordic countries
- Gloves: The best gloves for photo trips are those with which you can also operate the camera 😉 Many gloves are warm and chic, but they are usually taken off on location - to adjust the camera, change a new filter, turn a dial, etc. - and then taken off again. In the end, cold fingers often remain. Therefore, my tip: buy extra gloves that are suitable for taking photographs and with which you can also feel fine wheels and buttons for setting the aperture, for example
- Dry towels: enough cleaning towels to change - once soaked they no longer work - so it is best to take several larger ones with you; I recommend XL- towels (30x40cm for glasses), for example.
Typical things that can quickly go wrong (understandably so under the influence of the many new impressions of a photo trip):
- Lens change: the open bayonet of the camera is held in the direction of the wind (this creates dust on the sensor). Solution: Leave the camera on the ball head, create a kind of wind cover with the body, hold the bayonets open only briefly and switch quickly (difficult if one hand still has to hold the camera).
- Tripod set-up: In seascape photography, too much lava sand gets into the threads, making it difficult to adjust the tripod. Solution: On fine lava sand beaches, extend the lowest (thin) segment of your tripod completely and leave it like this until the end of the session. Adjust the height via the other segments or the angle. Clean your tripod with water after the session BEFORE you retract the segments. And no, with a good tripod, the stability is also sufficient with the lowest segment 👍
- Multiple exposure: in direct sunlight, burnt out (white) areas appear on the final images. Solution: in backlight, multiple exposure is recommended (e.g. via bracketing, HDR, etc). Even if it is not yet known how to ideally put these together in post-processing, this makes sense to still create significantly darker shots of such scenes - more about this in the workshop, is explained on the spot in 2 minutes😉.
- Blurring images. The solutions depend on the causes, these are usually:
- Image stabiliser: despite using a tripod, the image stabiliser is switched on (can lead to slight blurring).
- Focal plane: The autofocus field is positioned too close (with a classic landscape setup, it is better to set it too far back, otherwise an entire mountain range, for example, will be out of focus - in the workshops, of course, I explain this point in more detail).
- Aperture value: In favour of a longer exposure time, too high aperture values are set, e.g. higher than f/16, resulting in strong diffraction blur. Solution: Use grey filters
- Finger pressure: The camera is touched at the moment of release (blur due to slight vibration; can be solved with cable release, remote release or delayed self-timer, usually 2 seconds are sufficient).
- Tripod stand: When photographing in sand, the tripod slowly sinks. This is especially critical with longer exposures. Solution: when setting up the tripod at a new location, it should be slowly pushed in from above so that it does not sink in further in the wave area.
Last but not least, here are two tips that I would personally recommend to you:
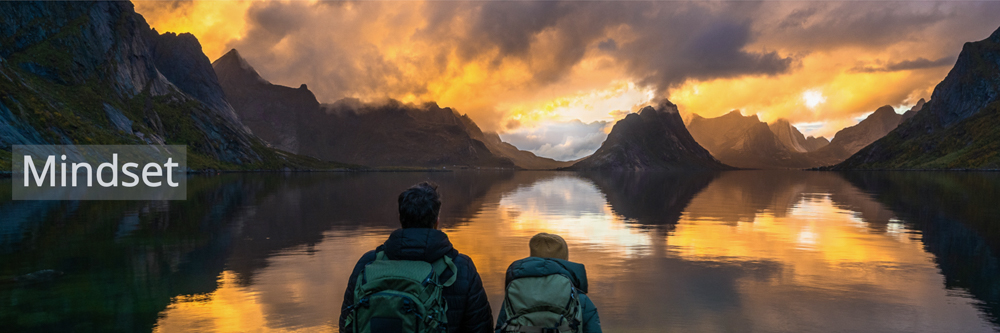
- Be aware of waves: When photographing in the surf zone, watch out for EVERY wave and never ignore them, even if the danger seems very small at the time. As a photographer, you often move around looking through the viewfinder - with this "blinker effect", it's easy to forget your surroundings, and Iceland in particular has pretty much the highest sneaker waves in Europe. But this is also the case on the Spanish and Portuguese Atlantic coasts. So, at regular intervals, a wave comes up that is significantly higher than what you might have observed for minutes before.
- Allow for deceleration: You're at a great spot right now? Let go of the idea of capturing EVERYTHING interesting about this spot here and now - this always causes stress and careless mistakes in the implementation. Take your time when choosing your subject, let the surroundings and details sink in before you look through your camera viewfinder. Pick out one, at most 2 scenes and shoot them calmly. When you are satisfied, take a deep breath, enjoy nature and look for the next motif...
And that's it! I hope I have given you some interesting facts for your preparation and wish you a nice day,
Thomas